How to Use Hootsuite for Instagram – Schedule Posts [step-by-step]
Whether you’re a business owner, a food blogger, or a fashion blogger, we know you love Instagram. Whether business or individual, Instagram is now popularly used as a tool to spread the message across a wide audience.
Instagram users need to gain followers, increase likes, and get more views on their content like videos and stories to get their message across. There are many ways to use Instagram today. Even if you are an old Instagram user, one thing you may not know is how to use Hootsuite for Instagram. If you don’t know how to use Hootsuite for Instagram, let us take you through the entire process.
How to use Hootsuite for Instagram
If you are running a business or are a blogger, you may not always be available to post on Instagram. In this case, applications like Hootsuite allow you to schedule Instagram posts, so they can be posted on the date and time that you set. Here are some simple steps to follow to schedule posts on Instagram with Hootsuite.
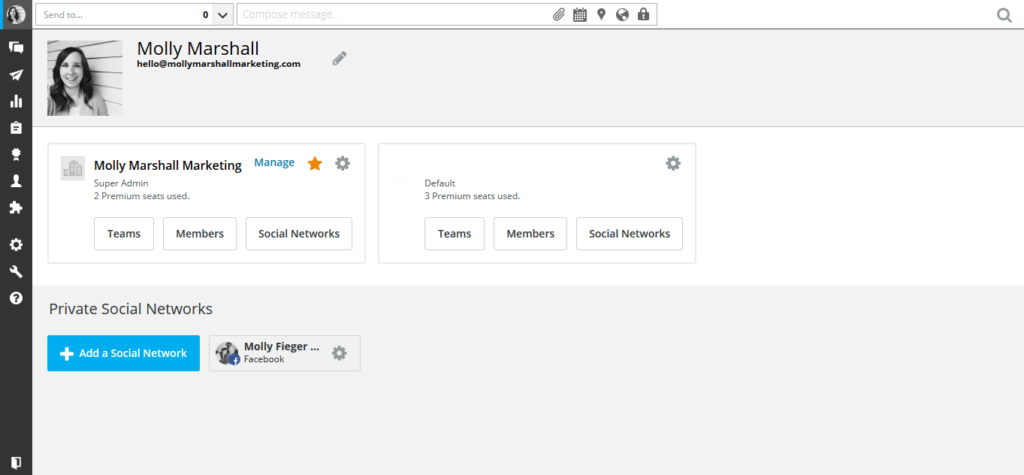
Step 1: Before you can schedule your Instagram posts, you need to add the Instagram account to the dashboard of the Hootsuite app. To add an account open your profile on Hootsuite and choose the “add social network” button shown in blue color.
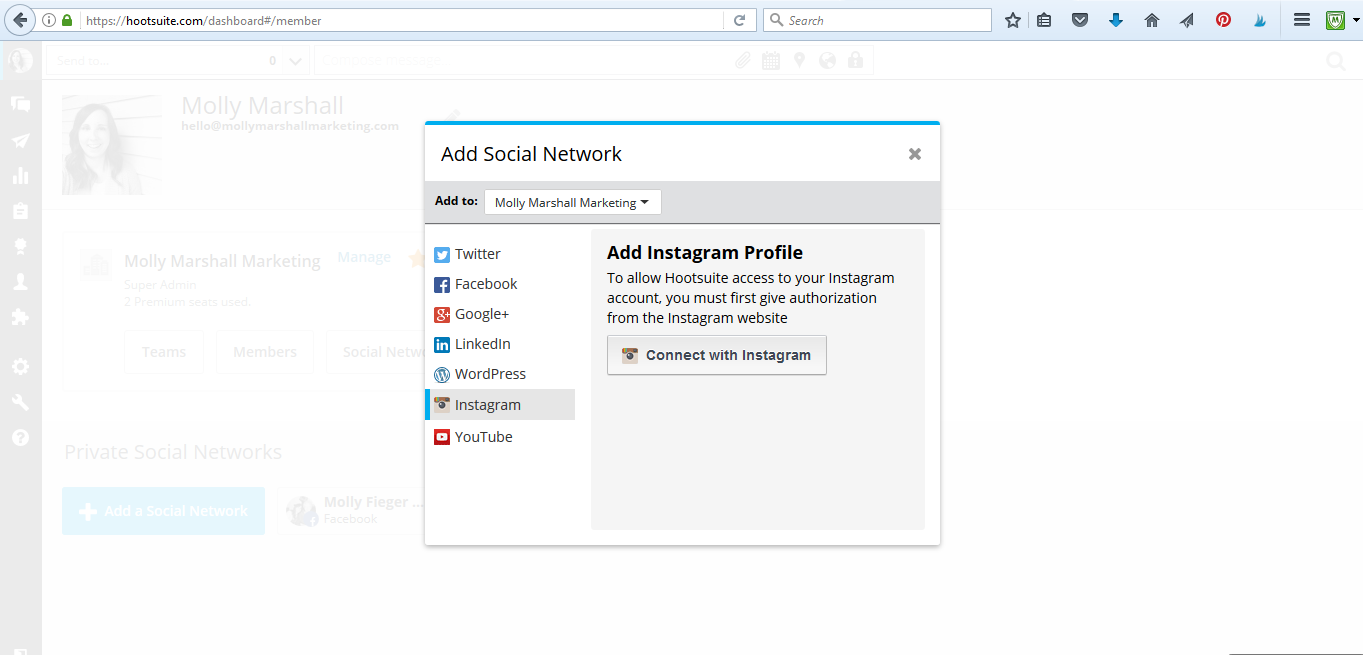
Step 2: From the options that open, choose “Instagram”.
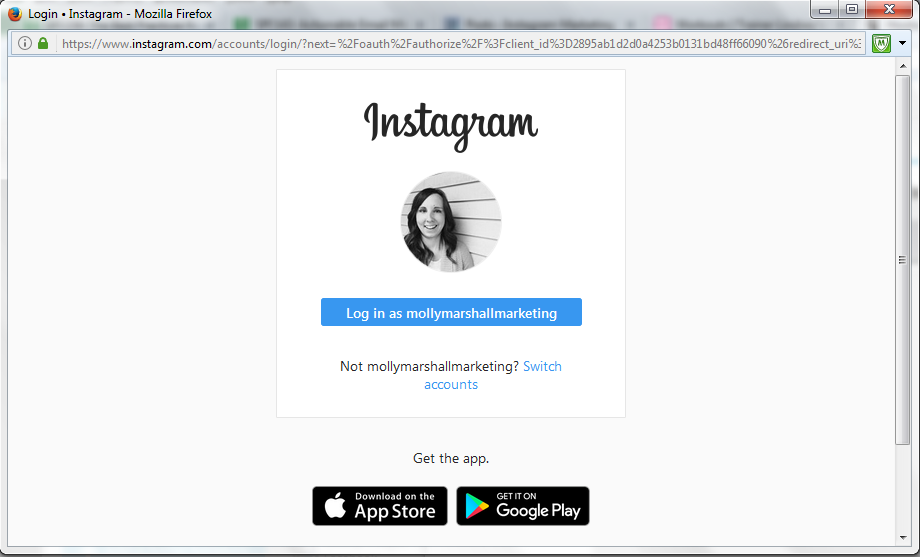
Step 3: This will open the Instagram log-in dialogue box. Then log in with your Instagram credentials i.e. your email/phone number and the password.
Step 4: Congrats! Now your Instagram account has been added to the Hootsuite app.
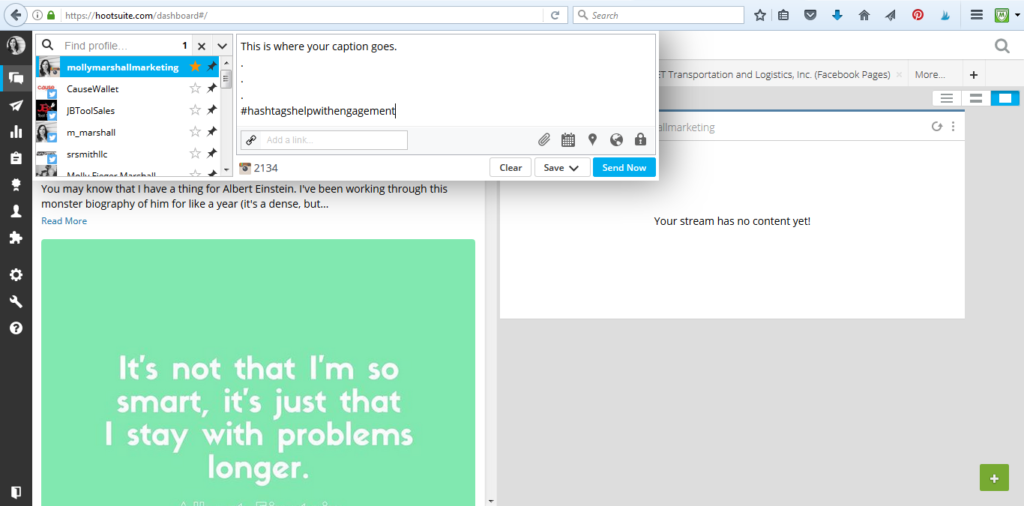
Step 5: Select the option of the Instagram profile in the drop-down menu that opens from the streams dashboard top. Here add your caption and appropriate hashtags as needed.
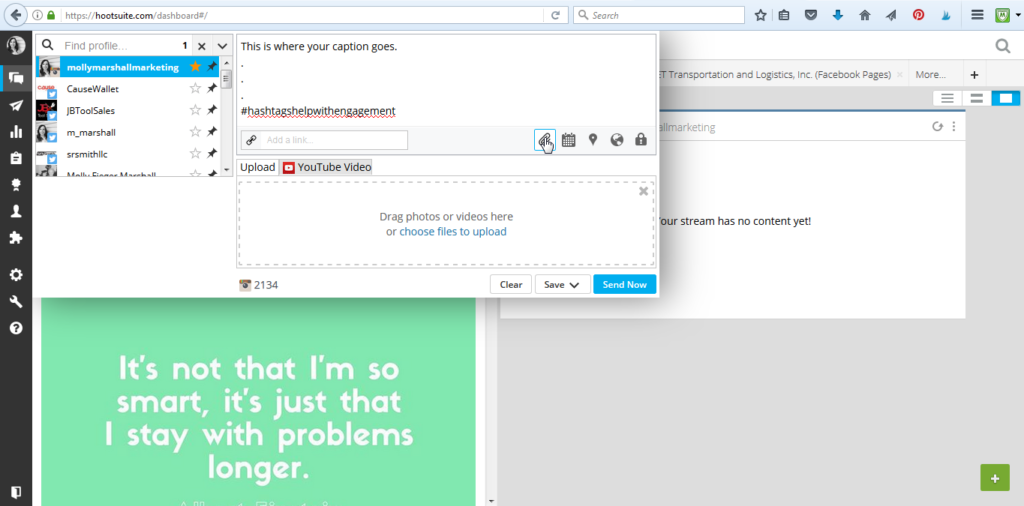
Step 6: Then click on the paperclip icon to add the image you want.
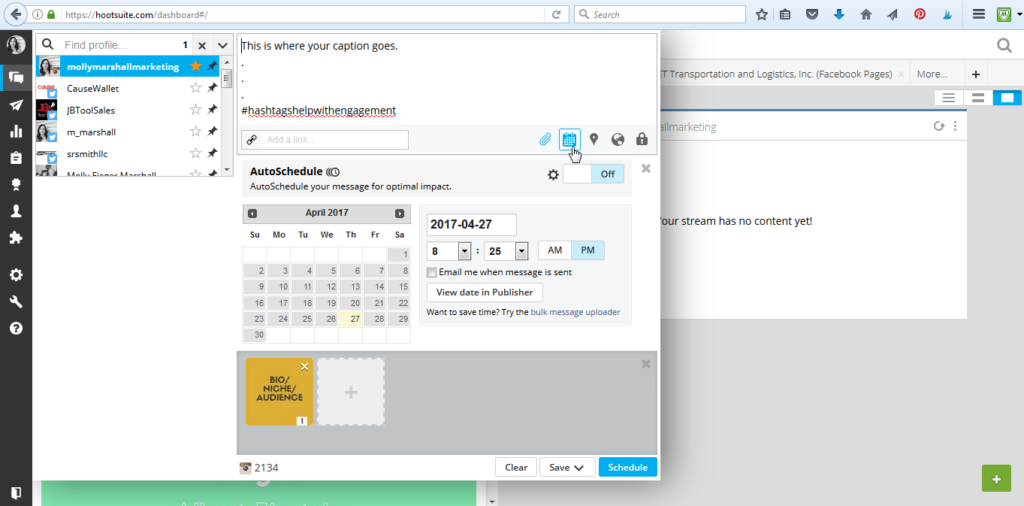
Step 7: Now you can schedule your post. Click on the icon of the calendar to add your date and time for posting the image.
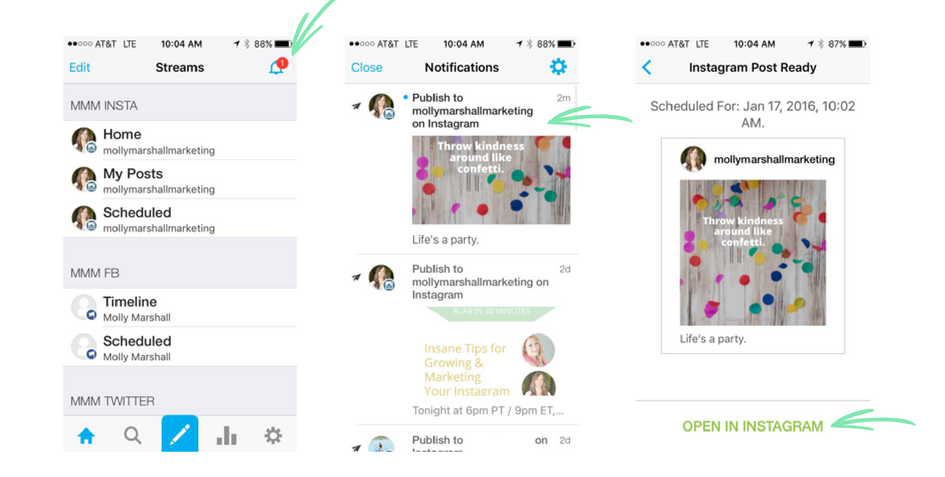
And that’s all. Once you have completed the final step of scheduling the post, it should be uploaded on the set date and time. Before being uploaded on Instagram, you will receive a Hootsuite app notification on the device.

On opening the Hootsuite app you can see the post using the notification bell located at the right top corner. Then click on the image that you wish to post and choose “open Instagram”.
The app will ask if you are appropriately logged in with your own Instagram account. If you answer with a “yes”, the posting wizard will open so that you can complete the posting process. Finally, since your caption will be in the clipboard of your phone, you can paste it simply into the Instagram caption box.
That’s all! We’ve taken you through the step-by-step process of using Hootsuite for scheduling Instagram posts. Now that you have the complete step-by-step process, don’t miss out on the opportunity to schedule your posts with ease whenever needed.
Comments